There’s nothing like HOMEMADE CHILI. Spicy, mild, sweet, meaty, veggie, tomatoey, brothy, thick, white, dark… I love how every cook has their own flare to their own pot of autumn warmth! There is really not ONE way to make chili…
On that note, this post isn’t about to tell you the RIGHT way to make chili. I’m actually writing it–not to teach you guys how to make chili–but to teach you how to cook dried beans. Now, don’t deter away from this post yet! I want to explain the most effortless way to cook dried beans for this soup!
A little background to re-hydrating legumes.
1. Before you do anything, always complete the following two steps first:
a. Sort beans for bad beans and rocks. Also rinse them of dust and dirt.
b. Cover 1 lb beans (2 cups) in 6-8 cups of water.
2. Consider which method is best for you, “quick” or “overnight.”
QUICK METHOD: Boil beans for 1 minute, turn off the heat and let pot sit for an hour. Then drain, rinse and fill pot back up with 6-8 cups water and simmer 4-6 hours, until soft.
OVERNIGHT METHOD: Cover soaking beans overnight. Next morning, drain and rinse beans and fill pot with 6-8 cups water. Cook on low heat for 4-6 hours (you can use a crock pot if you have one).
With the cooked beans you can let them cool and freeze them in zip bags if you wish, or proceed with your recipe.

Being in the absence of a slow cooker (I sold both of mine before moving out West), I decided to try the quick method for the first time. I had originally thought cooking beans on the stove would take longer, so I figured I’d have to make chili all afternoon and eat it the next day. But actually, this chili only simmered for 4 hours with slightly firm yet tender beans being the result–perfect for soup!
The process of this particular recipe goes like this:

- 2 cups dried black beans (or you can mix and match with other beans if you'd like)
- 2 cans tomatoes with chiles, plus liquid from can
- 1/2 package of taco seasoning
- 1/8 cup dried, minced onions (or 1 whole onion chopped finely)
- 1 handful of dried, green herbs of your choice (if using fresh, wait until serving to incorporate into pot)
- 1-2 tsp salt
- (optional) 1 lb of ground meat, cooked fully
- *Note* You're going to want to use a LARGE pot for this recipe. One that's at LEAST 5 liters! A stockpot works best.
- Rinse and sort 2 cups of beans. Cover beans with 8 cups of water. Boil them for 1-5 minutes. Turn OFF the heat. Let them soak with the lid ON for 1 hour.
- Rinse beans again and add them back to pot. Pour in the rest of your ingredients plus 5-7 cups water (if your pot is 5 liters like mine start with 5 cups of water; if you are using a stockpot, go ahead and use 7 cups). If there's too much water (closer than 3 inches from the top), boil the beans with the lid off until enough water evaporates for you to leave the lid on. The beans and flavors cook better with the lid on but if the pot is too full, it can boil over when you're not watching.
- Once you're content with the water level, turn your stove down to medium low and put the lid on. Every half hour or so, give your chili a stir just to see how it's doing. Unless you're using a slow cooker, I wouldn't leave your pot alone for longer than 30 minutes just to ensure both safety and to monitor the water level. While the beans are cooking, you want enough water to cover the beans so that they're boiling in something. If too little water, they might start sticking to the bottom of the pot. And if there's REALLY too little water and you aren't watching the beans, then your beans might burn (I'm speaking from experience here :-/). You may have to add 1/2 cup of water here and there to keep the beans cooking. Unless of course, your pot is larger than mine and then you'll have no problem using 8 cups of water to begin with, as mentioned ;-)
- After 3 1/2 hours you can start testing the texture of your beans by either biting into one (make sure it cools first) or smashing one with the back of a spoon. Keep cooking them until you think they're ready. About 30 minutes before serving, add your cooked meat and any fresh green herbs so that the flavors can merry for a little while.
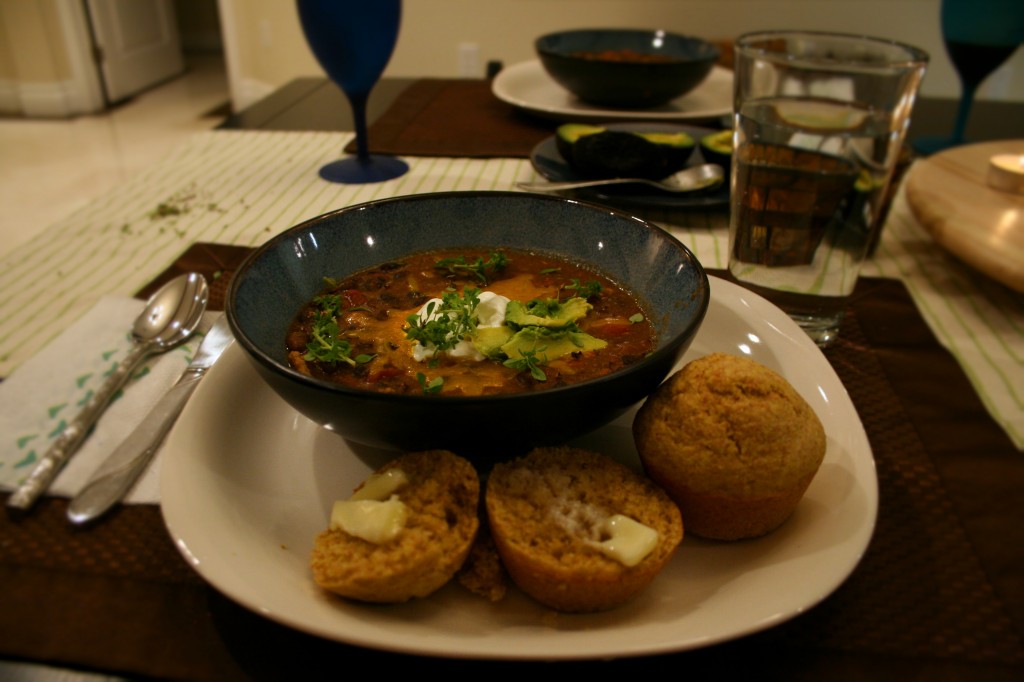
- Serve with cornbread or saltine crackers if you like!
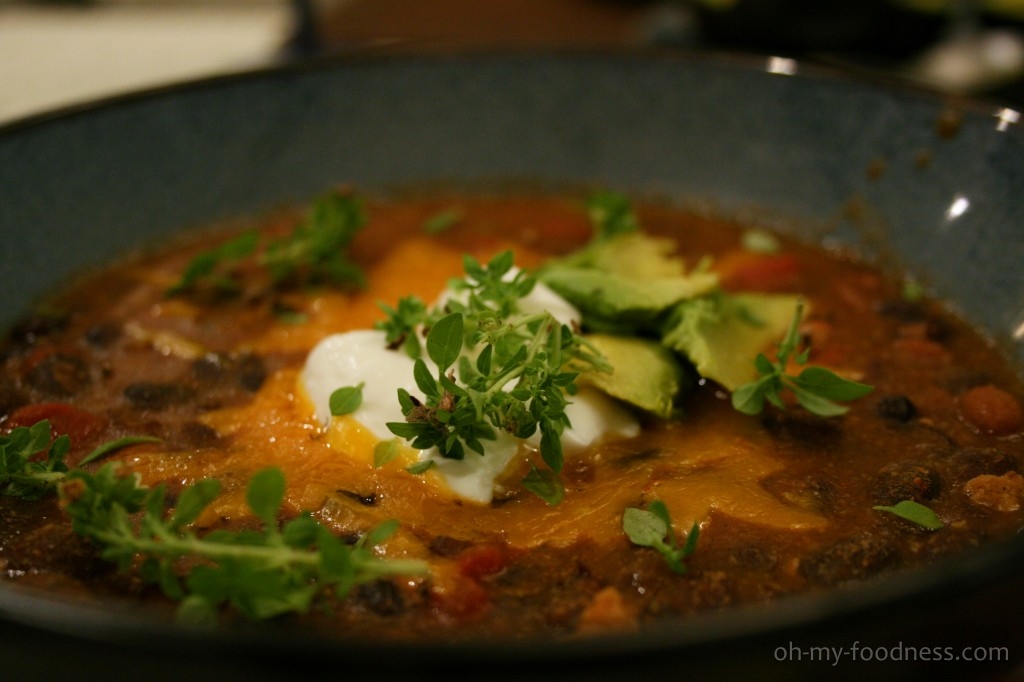
- I garnished my plate with fresh basil, cheese, sour cream and avocado!
 0
0 0
0 0
0


